What is Webalizer ?
Webalizer is a fast, free web server log file analysis program. It produces highly detailed, easily configurable usage reports in HTML format, for viewing with a standard web browser. It was written to solve several problems with currently available analysis packages. A vast majority of them were written in Perl or some other scripting language, and took forever to run. Some were not free. Some even produced wrong results, or results that were not in a useful format.
Webalizer features
- It is written in C to be extremely fast and highly portable. On a 200 MHz Pentium machine, over 10,000 records can be processed in one second, with a 40 Megabyte file taking roughly 15 seconds (over 150,000 records).
- Supports standard Common log file Format server logs. In addition, several variations of the combined log file Format are supported, allowing statistics to be generated for referring sites and browser types as well. Now also has native support for wu-ftpd xferlog FTP and squid log formats as well.
- Generated reports can be configured from the command line, or by use of one or more configuration files. Detailed information on configuration options can be found in the README file, supplied with all distributions.
- Supports multiple languages. Currently, Catalan, Chinese (traditional and simplified), Croatian, Czech, Danish, Dutch, English, Estonian, Finnish, French, Galician, German, Greek, Hungarian, Icelandic, Indonesian, Italian, Japanese, Korean, Latvian, Malay, Norwegian, Polish, Portuguese (Portugal and Brazil), Romanian, Russian, Serbian, Slovak, Slovene, Spanish, Swedish, Turkish and Ukrainian are available.
- Unlimited log file sizes and partial logs are supported, allowing logs to be rotated as often as needed, and eliminating the need to keep huge monthly files on the system.
- Distributed under the GNU General Public License, complete source code is available as well as binary distributions for some of the more popular platforms.
Installation
I assume you have apache / httpd installed now we just need to install the webalizer, and we can do it using yum or compile the sourcode. Let’s start by compile it through source code.
Installing through sourcecode
1. First we need to download the webalizer sourcode first
wget ftp://ftp.mrunix.net/pub/webalizer/webalizer-2.20-01-src.tgz
2. Then we need to uncompress it
tar zxvf webalizer-2.20-01-src.tgz
3. Makesure you have gcc compiler and Gd library installed, you can installed it using yum
yum install gcc gcc-c++ gd-devel
4.. Then we go to webalizer-2.20-01 directory , compile and install it
 cd webalizer-2.20-01
 ./configure
 make
 make instal
It is installed and you can checked the version now
webalizer --version
Webalizer V2.20-01 (Linux 2.6.18-92.1.1.el5.028stab057.2 i686) English
Installing with YUM
1. Just run the yum install command
yum -y install webalizer
it should install the webalizer but the version are more old that the sourcode version, the yum webalizer version was webalizer 2.01_10-25
How to configure it
1. Create a central directory for the webalizer configuration files
mkdir /etc/webalizer
2. Create two webalizer configuration files, a.example.conf from the
sample file and put it into /etc/webalizer directory. You need to locate the webalizer.conf.sample files and copy it to /etc/webalizer directory
cp /usr/local/etc/webalizer.conf.sample /etc/webalizer/a.example.com.conf
3. Modify LogFile, OutputDir and HostName of the webalizer config files. For example, for a.example.com.conf
vi /etc/webalizer/a.example.com.conf
and changes the content
LogFile /var/log/httpd/access_log

into

LogFile /var/log/httpd/access_log_1  # it depend on your httpd access_log you  can search it on /var/log/httpd/ directory

OutputDir /var/www/usage/a into OutputDir  /home/praetorian-id.org/public_html/webalizer  # it depend on your  apache virtual directory that you set on httpd.conf (/etc/httpd/conf/httpd.conf)
HostName localhost into
HostName praetorian-id.org # it depend on your web hostname
Note:You may want to specify other settings specific to the domain, such as HideReferrer, HideSite, etc.
4. To process all the virtual sites, run the following command:
# for i in /etc/webalizer/*.conf; do webalizer -c $i; done
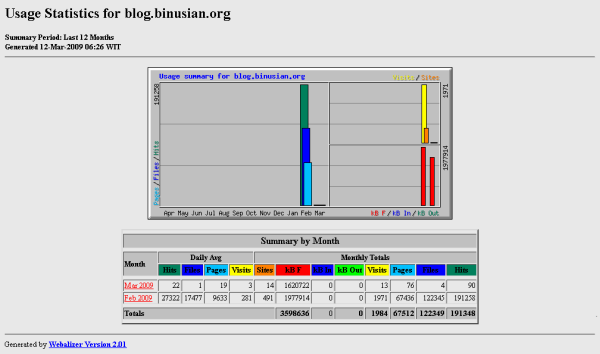
Now you can see the webalizer files on your site, example :


How to set Webalizer on multiple virtual domain :
Tha above tutorial are to set the webalizer for singel domain, how about if you needed to create webalizer for multiple domain ? , you need to makesure that you have create custom log on your every virtual domain setting on httpd.conf it is usually on /usr/local/apache/conf/httpd.conf , here is the eample :
<VirtualHost 222.11.222.33>
    ServerName test.com
    ServerAlias www.test.com
    DocumentRoot "/home/domains/test.com/htdocs"
    CustomLog "/home/domains/test.com/logs/access_log" common
</VirtualHost>
as you can see above, i set the custom log on /home/domains/test.com/logs/access_log , please also make sure you have create the /home/domains/test.com/logs directory and set the permission was set for domains users
-rw-r--r-- 1 domains users 677485 Jan 7 19:55 access_log
then set the log path on your webalizer conf on /etc/webalizer/
# vi /etc/webalizer/test.conf

LogFile         /home/domains/test.com/logs/access_log
then set it per virtual domain that you have 🙂
and last thing , restart the httpd , if you are using rpm
# service httpd restart
if using httpd source binary, checked the apache process on ps aux
# ps aux | grep daemon

daemon   10523  0.0  0.0  21556  8704 ?   S    20:07   0:00 /usr/local/apache/bin/httpd
the apache was installed on /usr/local/apache find the apachectl on /usr/local/apache/bin/apachectl and restart it
# /usr/local/apache/bin/apachectl restart
You should see the size of the access_logs on /home/domains/test.com/logs/access_log increase , if not checked the permission and webalizer config on /etc/webalizer/test.com.conf
Do not forget to add cron so the webalizer can be udpated automaticly
#crontab -e

1 * * * * /root/dowebalizer >>/dev/null 2>&1
i will set the crontab every 1 hour to execute the shell script on /root/dowebalizer
Here is the cron list explanation :
- minute (0-59),
- hour (0-23),
- day of the month (1-31),
- month of the year (1-12),
- day of the week (0-6 with 0=Sunday).
ooh ya , don’t forget to create the shell script on /root/dowebalizer
vi /root/dowebalizer
#!/usr/bin/perl
use strict;

my @files = </etc/webalizer/*.conf>;

foreach my $file (@files) {
        chomp($file);
        system("/usr/local/bin/webalizer -c $file");
}


